

Regular changing of oil is probably the most critical aspect of Honda Civic ownership and maintenance. The 7th generation Honda Civic was known around the world for its reliability, but without routine maintenance and oil changing you will seriously limit the lifespan of your Civic. Over time, oil becomes less effective at its job and needs to be changed. Fortunately, this is a job you can do yourself with tools you likely already have in your garage or toolset. An oil change on a 7th generation Civic should take about 25-45 minutes. This guide will walk you through the process and also serve as a reference for engine oil type, weight, filter recommendations, and more.
Lubrication Intervals
The standard recommendation for oil changes on almost any car is that you should perform and oil and filter change once every 3,000 miles. However, with advances in engine and oil technology over the last few decades, it is permissible to change your oil and filter every 3,000 to 7,500 miles . A few factors go into deciding where exactly your Civic might fall in this range. With these 7th generation Civics, many have now surpassed 100,000 and even 200,000 miles on the odometer, so you can change the oil less frequently than you would on a vehicle with less mileage.
With modern synthetic oils, like the Penzoil Ultra Platinum brand we recommend, you can also get away with changing your oil less frequently. With a 100,000+ mileage Civic running synthetic oil you can do just fine changing your oil every 7,500 miles. You should also consider the kind of driving you put your vehicle through. If your Honda Civic is regularly driven through a city in stop-and-go traffic, you will be putting more stress on your engine than you would with Civic that spends most of its on the highway.
Recommended Oil Type

We’ve already mentioned that our oil recommendation is a full synthetic. Even with the minor price increase over regular, non-synthetic oil, you will end up saving money as you will need to change your oil less frequently. If you would prefer to use a conventional non-synthetic motor oil, then Valvoline makes this very cost-effective option that will work with 7th generation Honda Civics. Note that there certainly isn’t any issue with using conventional motor oil — your engine will run just fine on a non-synthetic. However, synthetic oil is simply more cost effective.
Recommended Oil Filter

For your replacement oil filter, we recommend you use a Mobil 1 M1-110 Extended Performance filter. While it may be tempting to go with the cheapest oil filter you can find, the oil filters you put into your engine have a significant impact on the overall lifespan of your Civic. To the untrained eye, most oil filters undoubtedly look the same, especially to someone who knows they’ll be changing their filter again in another 5,000 miles. One often ignored detail to consider about your oil filter choice is the total contaminant capacity of the oil filter. The standard competing brand for a 7th generation Honda civic will hold up to 14.0 grams of contaminants, while this Mobil 1 M1-1110 filter holds twice that at 28.0 grams. This will work for all Honda Civics from 2001 to 2005.
Another important note: I strongly recommend that you stay away from FRAM branded oil filters! FRAM filters are often very cheap, but naturally this means that the actual build quality is cheap. I normally try to stick to only recommending products I believe in, but I have heard too many horror stories of FRAM filters breaking up and becoming adding contaminants instead of capturing them! I have heard of more than one occasion where the inner-material of a FRAM filter came loose and caused severe damage inside the engine by going straight for the camshaft. While it may be tempting due to the cheap price point, you should steer clear of FRAM filters.
Another high-quality option is the K&N HP-1010 filter. K&N oil filters generally feature high build quality. This particular filter also features the added benefit of an exposed 1in. nut so you can use a wrench to remove the filter easily.
Oil Capacity
The 7th generation Honda Civic has an oil capacity of approximately 3.7 quarts, or 3.5 liters.
Oil Change Process
-
Auto repair ramps are a useful tool for the at-home mechanic. This set from RhinoGear is very affordable and is safe up to a limit of 12,000 lbs.
- Make sure your Civic is on a completely level surface before beginning work.
- Next you should jack up the vehicle to allow a bit more space underneath for you to work. You only need to jack up the driver’s side. The jack point is just behind the driver’s side front wheel. Jack it up and place a jack stand directly behind the jack. Slowly lower your jack on to the jack stand and make sure it is stable. Never work underneath a vehicle with only a jack holding it up. The jack can slip or roll away resulting in serious injury.
- Additionally, if you don’t own a jack or jack stands, I highly recommend buying a set of auto repair ramps which will allow you to just drive up and complete jobs like this much easier.
- Pop open the hood and remove the oil cap. This allows the oil to flow more freely as it will act like a breather.
- Locate the oil pan drain plug on the driver’s side of the oil pan. The drain plug bolt head will be facing the rear of the vehicle.
- Take your oil pan and situate it just underneath this drain plug. Note that the oil never flows directly downwards, it flows out and down. This isn’t a big deal though, as you can always slide your oil pan around later on.
- Take a 17mm wrench or socket wrench and begin removing the oil drain plug bolt. Be cautious of the hot oil that will soon be flowing out of the drain and be sure to wear protective eyewear and rubber gloves.
- Pay attention to the difficulty in turning the drain plug bolt. As soon it is possible to do so, start turning the bolt by hand.
- As soon as the bolt is free, be sure to keep a good hold of it and pull it away so it does not fall into the oil pan. If you miss, don’t worry. It happens to the best of us!
- Allow a few minutes for the oil to drain. Wipe off old oil from the surfaces around the drain plug.
- As soon as the oil is done draining, insert back in the oil drain plug. You can actually leave this finger tight, or you can tighten a bit with the wrench but be sure to not over-tighten — it’s an unnecessary headache for the next mechanic who might be you, not to mention you could strip the threads.
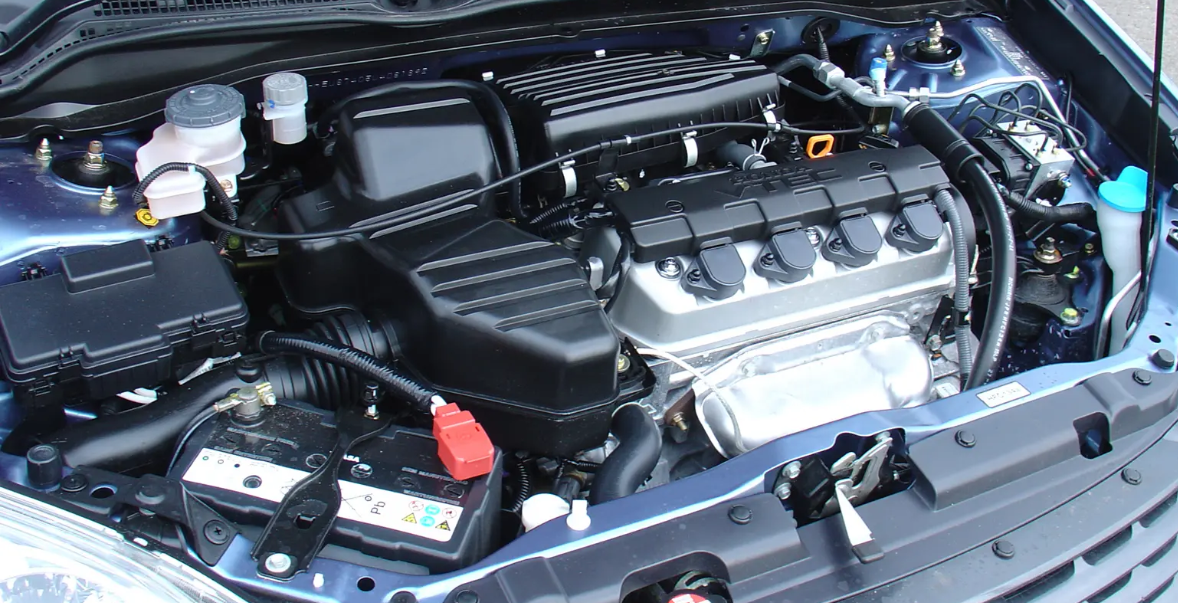
- Locate the oil filter on the driver’s side of the engine block.
- To remove the old oil filter, simply unscrew it off. If you cannot quite get it by hand, you will need to use a set of oil-filter pliers. If the filter has been over-tightened and cannot be unscrewed by hand or with a set of filter pliers, you can drive a long punch through it and use it as a handle to unscrew the filter.
- Make sure that the old O-ring is not still attached to the engine. If it is, simply pull it off as we will be using the new O-ring attached to your new oil filter.
- Take your new oil filter and lightly apply some oil to the O-ring. Screw the filter on by hand. Again, this only needs to be hand-tight.
- Lower your Civic back down by jacking it up a bit more off of the jack stand. Pull the jack stand out and then lower the car completely.
- Go back to the engine bay and begin pouring your new oil back in to the engine. You may need to use a funnel. The engine requires 3.7 quarts of oil. Pour the first 3 quarts in, and then be careful about the remaining 7/10ths of a quart. Try to pour slowly and make sure you get exactly 3.7 quarts or just a little bit less. Over-filling an engine is much worse than under-filling it a little bit. It’s also much easier to pour more oil in than it is to drain some out. You can use the dipstick to check the level. There are two holes, one for high, and one for low. Try to get the oil level just between the two extremes on the dipstick.
- Start the vehicle and let it idle for a few minutes. Make sure there are no leaks on to the pavement underneath the engine.

 Auto repair ramps are a useful tool for the at-home mechanic.